Showing posts with label recipe. Show all posts

Sunday, February 26, 2012

ginger•cinnamon braised seitan

Brock and I hardly ever fight, but one of our more recent altercations was over, of all things, seitan.
He's generally not a picky eater-- I can give him just about anything for dinner and as long as there's a hunk of bread with it he says it's awesome.  But, as I found out, he does not like seitan that's even the least bit spongy...
My first attempt at making seitan for this recipe made a product that was a little spongy.  I thought it was still pretty good. Brock said he liked the flavor, but wasn't into the texture.  
He then brought up (several times throughout the meal) this teriyaki beef his mom used to make when he was a kid, and proceeded to suggest that I make my seitan a little more like that teriyaki beef.  
"That teriyaki beef my mom made when I was a kid was really good..."
"The teriyaki beef was chewier..."  
"You should try to broil this, like my mom did with the teriyaki beef..."  
I took it a little personally and I quickly became a little resentful of the teriyaki beef. 
First of all, this is not teriyaki (teriyaki does not contain cinnamon or red wine).  Second, this is not beef.  Third, I was so excited to use this method of smashing the ginger instead of peeling and chopping it (what a time saver!), and that just wouldn't work as well if I broiled the seitan ala said terriyaki beef.
We agreed to disagree for the time being.   But, this whole thing just made me more determined to stick with my original vision of the recipe and adjust the texture in other ways (I did not set out to make mock teriyaki beef and I was not going to end up with it).
But, attempt two came out even spongier.  It looked like animal brains and reminded me of a cheesy joke I'd heard: 
What do vegan zombies eat?
Grraaiins!
Ha ha.
These grain-brains went down the disposal without making it to the smashed ginger.
Then came attempt number three, which came out chewy and flavorful.
Even Oliver, the pickiest one in the house, was happily noshing his seitan. Brock was excited about it, too.
And there were no comparisons to other, dissimilar recipes.
And marital accord was restored.


I know this recipe looks a little complicated at first glance, but making the seitan from scratch was really pretty easy for me once I figured out how to adjust the firmness.  And, you can make the seitan ahead of time or even use store bought.*  With pre-made seitan, this comes together quickly and easily...  
And, of course, it's delicious.


the veggies:
-for the broth:

  • 3 cups water
  • 3 cups veggie broth
  • 3 TBS soy sauce

-for the seitan:

  • 1 cup vital wheat gluten flour
  • 1/2 tsp garlic powder
  • 1/2 tsp ground ginger
  • 1/2 cup cold veggie broth
  • 3 TBS soy sauce
  • 1 TBS sesame seed oil (or other oil)
  • 1-2 TBS water, if needed

-for braising:
  • 12 to 16 ounces of seitan strips
  • 1/4 cup agave nectar (maple syrup or honey would also work)
  • 1/2 cup seitan broth*
  • 1/2 cup red wine 
  • 1 TBS cooking oil
  • 1 cinnamon stick
  • 1 large piece of fresh ginger (about 3 inches long), left un-peeled and smashed with the broad side of a large knife


the love:
-for the broth:
  1. Combine all the broth ingredients in a large sauce pot and bring to a boil.
-for the seitan:
  1. Combine the wheat gluten, garlic powder and ground ginger in a mixing bowl.
  2. In a small mixing bowl or large measuring pitcher, combine the 1/2 cup veggie broth, soy sauce, and sesame oil.
  3. Pour the wet ingredients into the dry and stir until the mixture forms a stiff dough.
  4. Knead for 3 to 5 minutes, kneading in a tablespoon or two of water if the dough is too stiff.**
  5. Divide and stretch the dough into two flat "cutlets", and drop into the boiling broth.
  6. Immediately reduce the heat to a simmer and cover.
  7. Let simmer for 45 minutes.
  8. Cool for awhile on the stove.  If you're not ready to use it yet you can store the seitan in its broth in the fridge.
  9. When you're ready to braise the seitan, drain it, making sure to reserve some of the broth***, then slice it into strips.
-for braising:
  1. Whisk together the agave, seitan broth and wine in a measuring pitcher or small bowl.
  2. Heat a large skillet with oil over medium to medium-high heat.
  3. Add the seitan and saute until it's browned on the edges.
  4. Add the smashed ginger and cinnamon stick and stir for a minute.
  5. Pour some braising sauce into the pan until the seitan is half-covered.
  6. Stir and cook until the sauce is almost all gone, then add more.  Repeat until you've used up all the sauce and the seitan is still just a little saucy (this will take about two or three batches and about 20 minutes).
  7. Remove the cinnamon and ginger and serve over rice or cous cous with a steamed green veggie on the side.


notes:


*If you want to use store-bought seitan, skip right to the braising and use 1/4 cup veggie broth, 1/4 cup water, and a tsp of soy sauce for the 1/2 cup seitan broth.
** This is the step where you can adjust the chewy- or spongy-ness of the seitan.  If you want it really chewy like Brock likes it, avoid adding extra water and knead well-- it will be very stiff.  If you want it more tender, add some water and knead a little less-- it will be like a firm bread dough.
***You'll use the reserved seitan broth in the braising sauce, but I also use a half-diluted solution to cook my rice or cous cous to make it more flavorful.

Saturday, February 11, 2012

carrot•quinoa risotto

I love my town-- with its spectacular views, fresh air, laid-back neighbors and easy accessibility to the mountains, forests and surrounding small communities...  
That is, I love it when I'm not hating it.
I once drove past a neighbor's house on my way home to see him standing there in his front yard, beer can in hand, watching six-foot flames dance off a couch.  I do respect him for getting rid of his couch before winter came-- unlike the thrift store a few blocks away which had a couch sitting out front in the snow half the winter.  
And you have to love the urinal on the back of another neighbor's shed-- I'm just grateful for the fact that I cannot say with certainty whether or not it actually gets used.  I can, however, tell you with certainty that there are several cars and boats, a laundry truck, and an ancient bulldozer laying around that have not been used in years.
Amidst all this, across the highway from a three-story log tower inexplicably built onto a hodge-podge house, and sort of kiddy corner to the afforementioned snow-soaked couch-selling thrift store, lies an anomaly-- the local tavern.   
I used to hold the tavern in high regard.  It's spendy so we don't go there often, but we have always looked forward to it.  So, a couple weeks ago when Brock and I found ourselves out at dinner time and the kids at home with a sitter, we decided to spring for it.
Dinner started out nicely with a good white wine and a delicious Thai tofu appetizer. 
But I started to feel a little uncomfortable when the table next to us sat down and ordered a bottle of Dom Peringnon, just "to celebrate life" (in other words, to show off?).
My excitement for the place dwindled a little more when we got our entrees, two carrot quinoa risottos.  We had had this dish before and loved it.  But this time-- not so much.  There were about a dozen different vegetables in it, most of which were grossly overcooked.  I love Brussels sprouts when done right, but mushy ones have all the flavor of a dirty gym sock.  The light was too dim to even identify some of the other chunks, and they did not have the, um, distinctive taste of the Brussels sprouts.
Bummer. 
To try to raise our spirits, we ordered the chocolate cake for dessert.  Sure bet, right?  
Eh...
Brock thinks my Insane Chocolate Cake is better-- more moist and chocolatey.  I think I agree.
So, overall, for about $100 (a big chunk of change for us to shell out on dinner) we got a mediocre meal in a place with kind of a stuffy atmosphere.  
"I can do better," I thought.  Brock already said I've accomplished that with the cake.  Next came the quinoa...


I kept it relatively simple-- saving the Brussels sprouts for oven-roasting or grilling (the only ways to cook a Brussels sprout, in my humble opinion), and keeping what I liked the best from the tavern's version: whole grape tomatoes and pearl onions.
This dish takes a while to make, but a lot of the cook time can be spent sipping wine (I suggest something like Bota Box's 2010 Old Vine Zinfandel, as opposed to Dom) and reading blogs on your tablet while occasionally stirring the pot.  
This makes for a pretty relaxing evening-- and really cheap compared to the alternative.  We like to enjoy the risotto while looking out the windows at the Continental Divide, a ripped-up car tent and a flatbed trailer full of construction refuse, all dusted with a layer of fresh snow and lit by the fuchsia-hued fading late-afternoon light...  
My hometown in all its glory.


the veggies:
  • 1 1/2 cups pearl onions
  • 3 cups carrot juice
  • 2 cups veggie broth
  • 2 TBS olive oil
  • 2 cups sliced (at an angle) carrots (about 2 medium carrots)
  • 1 large shallot, minced (about 1/4 cup)
  • 1 1/2 cups quinoa, rinsed and drained
  • 2 TBS lemon juice
  • 2 cups grape or cherry tomatoes
  • 1 cup frozen peas
  • 1/2 cup shredded parmesan, plus more for garnish
  • salt and fresh ground pepper, to taste


the love:
  1. Boil a few cups of water in a medium saucepan and add the whole un-peeled pearl onions.  Cook for three minutes, then drain and rinse the onions in cold water.  Cut the root end off each onion and firmly but gently squeeze to peel each one.
  2. Heat the carrot juice and broth together in your medium saucepan and keep at a simmer, stirring occasionally.
  3. Heat the oil over medium heat in a large sauce pan.
  4. Add the onions, stirring occasionally, for a couple minutes.
  5. Add the carrots, continuing to stir until the carrots and onions start to become tender on the edges.
  6. Add the shallots and stir until they start to become translucent.
  7. Add the quinoa, lemon juice, and tomatoes and stir well.
  8. Pour in some of the juice and broth mixture until the quinoa is just covered but some of the veggies are still peeking out.
  9. Adjust the heat if necessary, to keep at a healthy simmer.  Cook, stirring frequently, until most of the liquid is absorbed.
  10. Stir in the peas and add more carrot broth until the quinoa is just covered again.  Repeat until the liquid in the small pot is all used up, the liquid in the big quinoa pot is almost all absorbed, and the quinoa is done.*
  11. Stir in the 1/2 cup parmesan and season lightly with salt and pepper, to taste.
  12. Serve topped with more shredded parmesan. 
note:
* You'll know the quinoa is done when it's translucent and no longer crunchy-- this takes about 40 minutes total for me.   Add plain hot water to the quinoa if your liquid runs out but the quinoa isn't tender yet.  At lower altitudes you may not use all the liquid, and it will likely take less than 40 minutes for the quinoa to cook.

Tuesday, February 7, 2012

peanut butter•banana granola

I worry about Owen sometimes.
Who am I kidding?--I worry about my kids all the time...
But, this particular concern is one that's really been bothering me lately.
Because of this problem I worry he's not experiencing childhood like most other children (or like I did).
I am referring to the fact that Owen doesn't like peanut butter.  He used to tolerate it but now he flat out refuses it.  This just seems wrong somehow--I have a hard time watching his self-deprivation.
But, I'm learning that I need to let go of some of my worries and focus on the bigger problems (like the fact that Oliver refuses to eat spaghetti sauce).  
Let Owen eat cream cheese and jelly instead.
But, he's also missing out on this Peanut Butter-Banana Granola.


My first version, somewhat ironically, wasn't peanut buttery enough for Brock.  So, the next time I added even more peanut butter.  This granola has officially reached its peanut butter saturation point.
Owen won't touch it, but that just leaves more for the rest of us.


the veggies (or other stuff):
  • 3/4 cup peanut butter
  • 1/2 cup honey
  • 1/4 cup water
  • 2 TBS canola oil
  • 1 TBS vanilla
  • 3 cups rolled oats (or 2 cups oats and 1 cup Grape Nuts)
  • 1 cup puffed grains (like brown rice)
  • 1/4 cup ground flax seed
  • 1 tsp cinnamon
  • 1 cup banana chips, chopped or broken if desired*

the love:
  1. Preheat your oven to 325° and prep your biggest baking sheet (I line mine with parchment).
  2. Whisk together the peanut butter, honey, water, oil and vanilla in a large bowl until smooth.
  3. Add the oats, puffs, flax and cinnamon and stir well.
  4. Spread the granola on a baking sheet and bake about 30 minutes, stirring a few times during baking.
  5. Remove from the oven, stir in the banana chips and let cool completely before storing in an airtight container.


notes:
*If you have access to a place that sells those gooey, chewy, whole dried bananas, try chopping those up and adding them to this granola instead of banana chips.  They have much more flavor than banana chips-- they're just a little hard to find.

Thursday, February 2, 2012

chocolate•almond granola

Oliver's at the age (between about 20 months and 48 months), where it's best not to take him to the grocery store.  About half the time it goes just fine, and the other half it goes terribly wrong.  Once when Owen was Oliver's age he knocked over an entire (rickety) cardboard display of canned clams.  Of all things.  Who eats those anyway, and why do they need a whole display of them in the middle of the aisle?  Owen wasn't being bad-- just being your typical clumsy toddler.  I wasn't really mad at him-- just really embarrassed.  I was a little mad at Safeway, though, for trying so hard to sell canned clams.
When I do take Oliver to the store these days, I often belt him into one of those giant carts with the car on front (despite how hard they are to steer), and I usually even get him the free cookie from the bakery department.  This combination of strategies often works for about half my grocery list, then it gets difficult.  He's soon hanging out the side of his car, trying to wiggle out of his belt (why don't those things have five-point harnesses, like in real cars?), hollering "wanna walk!"  The only way to stop the hollering is to let him out of the cart.  But, as I learned with Owen and the clams, letting a toddler walk through the grocery store is not always a good idea...
So anyway, I usually try to go to the store either at the beginning of the week when both kids are in school, or on weekends when Brock's there to stay home with the kids (because Brock's almost as hard to take to the grocery store as my little boys).  But when we ran out of cereal (except for a box of Grape Nuts no one will eat) mid-week this week, I nearly panicked.  We are highly dependent upon cereal for breakfast.  
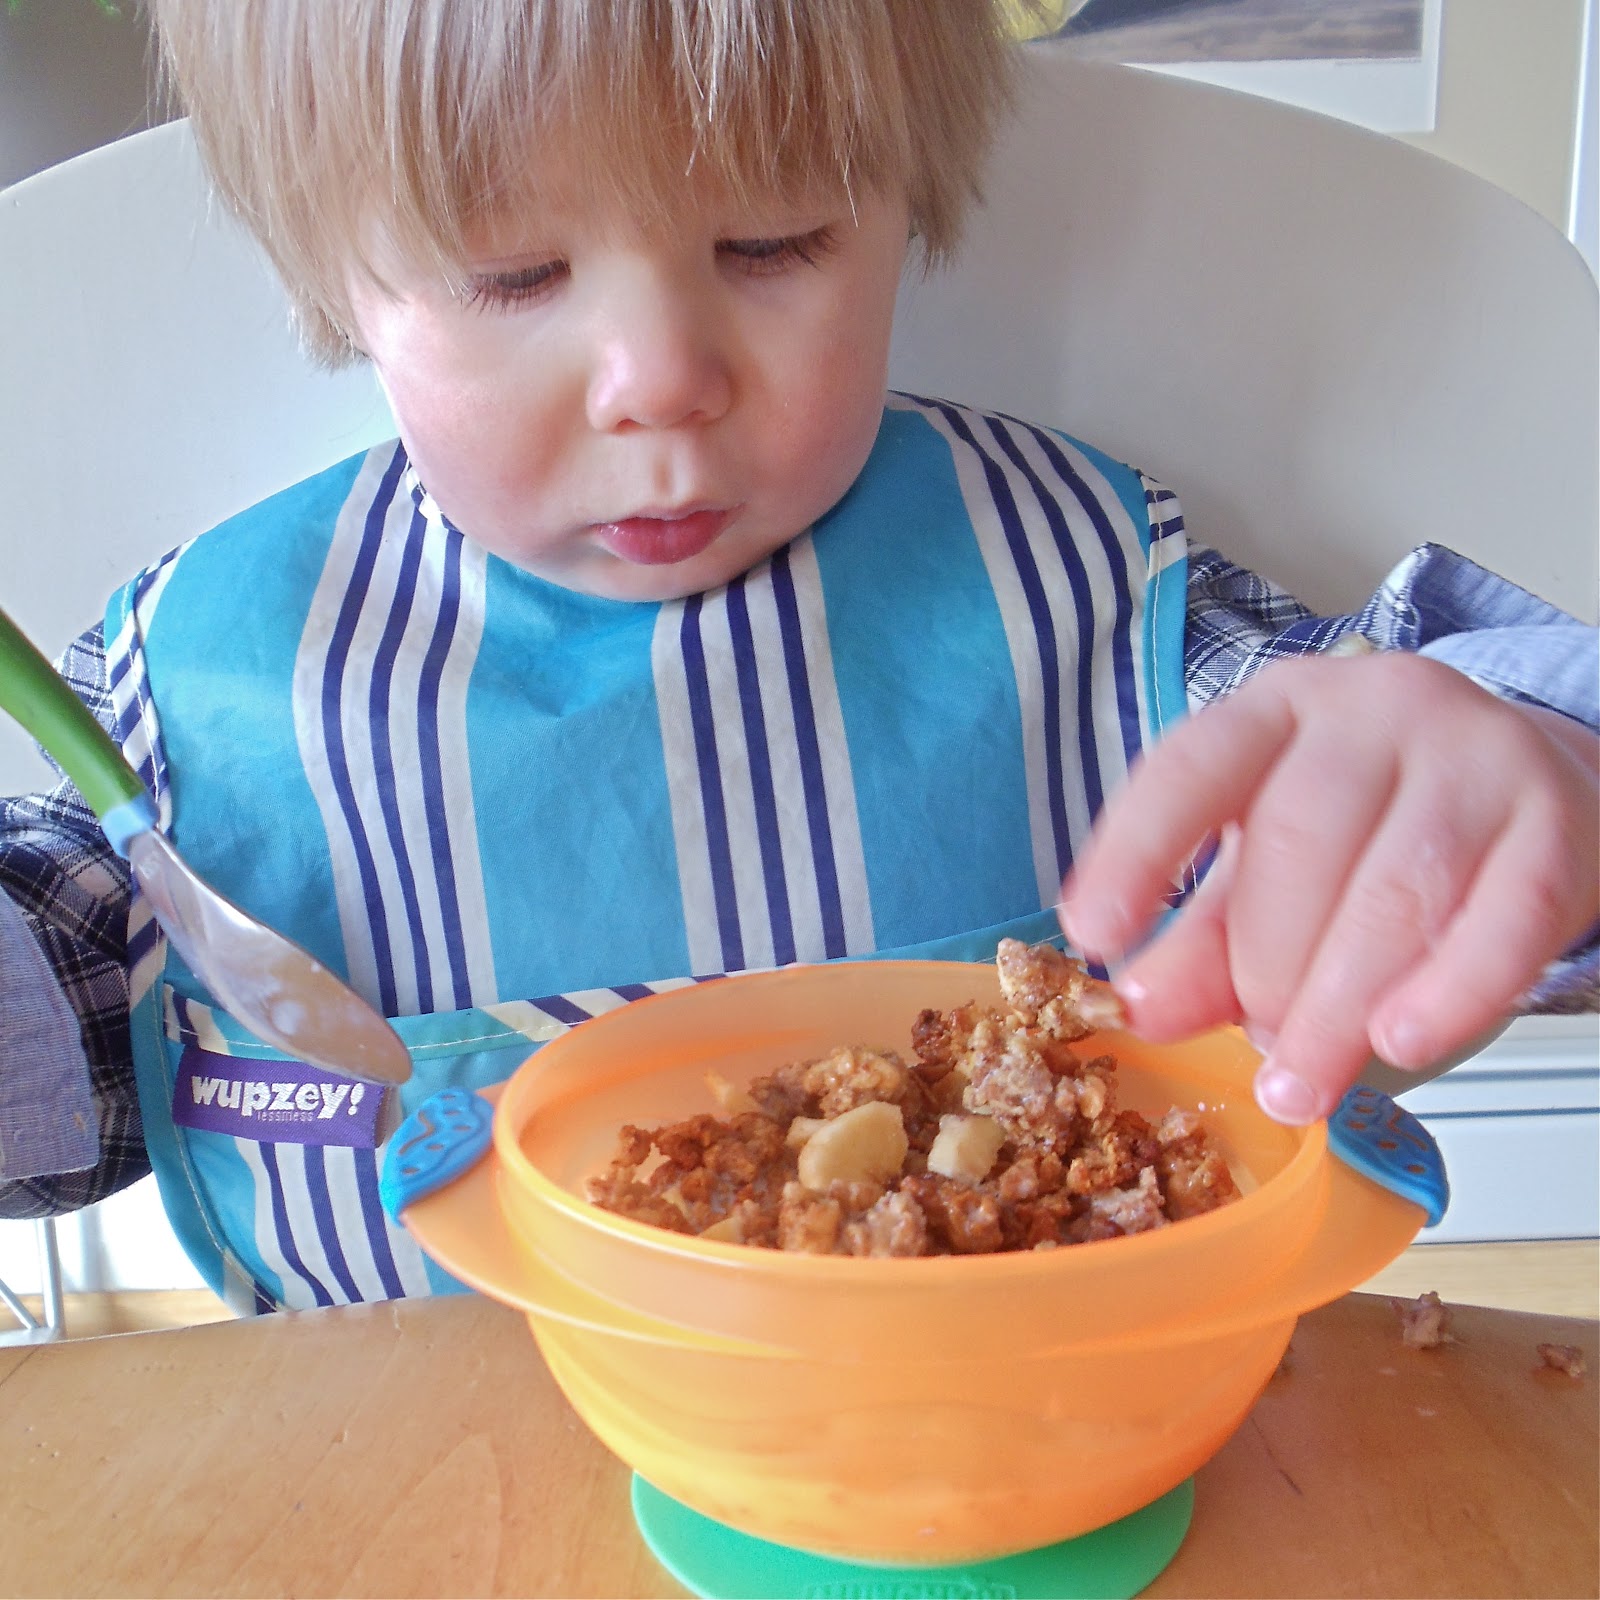
Then I remembered I used to make granola all the time.  And when I started making some this time I remembered how easy it is to make-- which is why I used to make it all the time.  This time I was feeling indulgent, so I made it chocolate.   It's really chocolatey, but not too sweet-- just how I like my chocolate.  Less than 24 hours after completing the batch, I've got about a serving left in the bottom of the jar.  I guess that means my guys liked it, too.


After I made the granola, it turned out I had to run to the store anyway to get some things for another recipe I'm working on for this blog.  This time I got lucky and the trip was uneventful.  But, I hope you're grateful I risked potential canned clam grocery store havoc for you...


the veggies (or other stuff):

  • 3 cups rolled oats
  • 1 cup Grape Nuts and/or puffed grains*
  • 1 cup sliced almonds
  • 1/2 cup cocoa
  • 1/4 cup ground flax seed
  • 1/2 cup shredded coconut (optional)
  • 1/2 cup canola oil
  • 1/2 cup honey
  • 2 tsp vanilla
  • 1 tsp almond extract
  • 1/4 cup water**
  • 1/2 cup craisins (optional)***


the love:

  1. Preheat your oven to 325° and line your largest baking pan with parchment (or lightly grease).
  2. In a bowl, combine the oats, Grape Nuts or puffed grains, almonds, cocoa, flax seed, and coconut (if using).
  3. Add the oil, honey, extracts and water, and stir well until evenly combined.
  4. Spread the oat mixture out evenly on your baking pan and bake for 30 to 35 minutes, stirring every five to ten minutes.  The oats will still be a little soft when you first remove them from the oven, but will turn crunchy as they cool.
  5. Stir in the craisins, if you're using them.
  6. Let cool completely before storing in an airtight container.  This makes about eight cups.


notes:
*I was at the grocery store a while back looking for a different kind of healthy cereal, and momentarily forgetting that Grape Nuts are gross (on their own, anyway), bought a giant box of them.  It's been sitting around, not getting eaten and begging to be used in a recipe ever since.  It turns out this recipe is perfect-- they add a nice sturdy crunch to the granola.  If you don't want to buy Grape Nuts for this (and I don't blame you), I've also used puffed grains (such as brown rice or kamut) a lot in granola.  The puffs impart a lighter, chewier texture to granola.  Both are nice.
**I also think this recipe would be good with espresso or strong coffee instead of the water, but I didn't try it, figuring my kids did not need to be caffeinated...
***I didn't use craisins this time, only because I didn't have any.  They would definitely be tasty in this, though.

Tuesday, January 31, 2012

frozen key lime yogurt•pie

I almost hate to admit this, but I still have a suitcase in my bedroom with a few things in it from our trip to Florida in December.  Maybe it's just that I don't need those things in the mountains in January.  Lord knows we're not wearing shorts.  Or swimsuits, for that matter-- I've sworn off taking the kids swimming at the rec center after a mortifying incident a couple months ago when Oliver's swim diaper leaked and they had to shut down the entire pool.
Or, maybe I leave the suitcase there because it makes me think of sunny, warm Florida every time I see it there, gathering dust on the bedroom floor.
There's a chance that half-empty suitcase inspired this pie.


Shortly after we returned home, Owen came home from preschool with this:


In the event that you're not an expert at interpreting abstract preschool art, in the drawing is an airplane (the cross at the bottom) flying from our house (bottom left) to Grandma and Papa's house (to the right), the beach with sand and water (top leftish), and the pool (far right).  Now it's obvious, right?  
This picture really is a good summary of what the kids do (and look forward to) in Florida, but I have some different favorites.  The beach and pool are definitely nice, but I really enjoy the down-time spent with family, the almost daily bike rides to Starbuck's during nap time, and, of course, the Key lime pie.


I've gone on a trip to Florida with my family every winter of my life, and for as long as I can remember, Key lime pie-tasting has been a big part of our trips.  We all have our favorite variations-- my mom likes the traditional crust and I prefer graham cracker-- but, we all like it tart.  The best variation I've had, though, is one Brock and I came across in Key West.  At any number of places along Duval Street, you can buy a piece of frozen key lime pie on a stick that's been coated in dark chocolate.  It's as good as it sounds-- we ate a lot of those on that trip...
In homage to that Key West specialty, as well as the suitcase sitting on my bedroom floor, I bring you my Frozen Key Lime Yogurt Pie.  This version is healthier than most, as it's made with honey and greek yogurt.  It's also much easier to make than most, with no baking or cooking involved.


Now that I've got some Key lime pie in the freezer, maybe I can go unpack that suitcase.
Eh, we'll see...


the veggies (or, non-veggies, as the case may be):
  • 1/2 cup margarine (or butter), melted
  • 10 whole graham cracker sheets
  • 1 1/2 cups plain greek yogurt
  • 1/3 cup Key lime juice
  • 3/4 cup honey
  • 2 tsp vanilla
  • 1/2 cup chocolate chips

the love:

  1. While your margarine is melting, use a food processor to process the graham crackers into fine crumbs.*
  2. Add the melted margarine to the crumbs and pulse the food processor until they're combined.
  3. Firmly press the buttery crumbs into the bottom of a pie plate and up the sides.  Store the crust in the freezer until you're ready to fill it.
  4. Give your processor pitcher a quick rinse, shake out any excess water, and reassemble.  We'll use it to make the filling, too: add the yogurt, juice, honey and vanilla and process until smooth.**
  5. Pour the filling into the crust and freeze until solid, about three or four hours.
  6. Once the filling is frozen, melt the chocolate in a double boiler or microwave.***
  7. Use a small spoon (or pastry bag?) to drizzle chocolate in thin threads onto the pie. Be careful not to get too thick of globs (like some of the thicker spots on my pie), as they're hard to cut through and eat once frozen.****
  8. Put the pie in the freezer another 10 minutes or so until the chocolate is solid, or until you're ready slice it and eat it.


notes:
*Low-tech method: crush the crackers in a baggie, then stir together the crumbs and margarine right in the pie plate.
**Low-tech method: whisk filling ingredients together in a bowl.
***I use a bowl that fits tightly over a small saucepan of hot water: heat the water to a simmer first, then remove from heat and place the bowl on top, making sure the water isn't high enough to touch the bowl.  Stir constantly until the chocolate is melted.  In the microwave, heat just a few seconds at a time, stirring between heating.
****When I first made this pie, I melted a full cup of chocolate chips and found that was way too much chocolate.  If, like me, you end up with chocolate left over, scramble to find something to dip in it (graham crackers, pieces of cereal, your husband's toothbrush), then place the random objects on parchment and harden in the fridge after dipping.

(Sorry, Mo.  Chocolate's not good for doggies...)

Saturday, January 28, 2012

cherry velvet•cupcakes with cherry cream cheese•frosting

Give Owen something with artificial food coloring in it, and prepare to watch him transform into a maniac.  He gets this checked-out look in his eyes (his pupils may as well be giant rotating spirals...); he gets extremely hyper and loses all sense of self-control (his head may as well be spinning on his shoulders with steam shooting from his ears...).  
This all sounds kind of comical and cartoon-like, but I assure you, it's not funny.  It's like a scary cartoon.  Freaks me out.
Shortly after Halloween, I made the mistake of letting him eat some Smarties in the car.  Not so smart...  "How bad could it get?"  I asked myself.  The answer was, it turned out: pretty bad.  Kicking, yelling, paying no heed to gentle reminders, then firm reminders, then desperate pleas from me until I was in tears.  Not him-- me.
Give Owen a piece of chocolate, and he's fine.  Six pieces of chocolate, even-- he'll maybe get a slight sugar buzz, but it's nothing like the food color trance.
So, needless to say, we avoid artificial food dyes.  Like the plague.
Let's just say I love him too much to put him through that.  And I love the rest of us in the family too much to make us witness or deal with that.  
So, with Valentine's day coming up, how do I tell my guys I love them without putting them through something potentially scarring?  Red velvet cake seems to be all the rage lately and there's something appealing about the red color.  It's so fun and festive-- especially for Valentine's Day.  I'm often tempted by these ruby-red treats (whoopie pies, big cakes, cute little cupcakes-- all so pretty) when I see them at a coffee shop or bakery-- until I read the ingredients list or a recipe for red velvet cake.   Red # 40 (the devil as far as I'm concerned-- who is appropriately dressed in red) is a big star in most of them.  I came across one recipe that called for a full third of a cup of red food coloring!


Thus my latest mission: red velvet without the Red #40 (or any color # anything, for that matter).  My secret ingredient: beets (with a little help from cherries).  This took a bit of research and testing to get the recipe right, but I think I've hit the sweet spot (please excuse the pun).  These are smooth, sweet, cherry-kissed (not beety), and a fun, festive color, to boot.  They are not the radioactive red of some red velvet treats, but I didn't have to sell my soul (or sacrifice anyone's sanity) to achieve it.  These are, lets say, a nice cherry tone.  Top them with pretty, pink cherry cream cheese frosting and something naturally red (I've used raspberries, fruit spread, and craisins on these), and you've got a pretty, festive, delicious treat that says "I love you" more earnestly than any Red #40-laced treat ever could.


the veggies:
-for the cupcakes:
  • 1/2 cup white whole wheat flour
  • 1 1/2 cups all-purpose flour
  • 2 TBS cocoa powder (natural-- not Dutch process)*
  • 1 tsp baking powder**
  • 1/2 tsp salt
  • 8 ounces cooked beets, plus any juice***
  • 1/2 cup black cherry fruit spread (like Smucker's Simply Fruit)****
  • 2 TBS lemon juice
  • 2 tsp vanilla
  • 1 cup packed brown sugar
  • 1/3 cup canola oil
  • 2 eggs
-for the frosting:
  • 1/2 cup cream cheese (half an 8-ounce container)
  • 1/2 cup black cherry fruit spread
  • 1 tsp vanilla
  • 1/4 cup powdered sugar


the love:
-for the cupcakes:
  1. Preheat your oven to 350° and prep a twelve-cupcake pan.
  2. Sift together the flours, cocoa, baking powder and salt in a large mixing bowl.
  3. In your blender, finely chop the beets and their juice (if any), stopping to scrape the sides of the pitcher as needed.
  4. Add the fruit spread, lemon juice, vanilla, brown sugar, canola oil and eggs, and blend until smooth.
  5. Stir the wet ingredients into the dry until just combined.
  6. Fill your cupcake cups and bake for about twenty minutes, or until cupcakes are firm in the center and/or a toothpick inserted in the center comes out clean.
  7. Cool completely before frosting.
-for the frosting:
  1. In a medium mixing bowl, combine the cream cheese, fruit spread and vanilla and beat with a mixer on high for a minute or two, until light and smooth (except for any cherry chunks).
  2. Add the powdered sugar and beat another minute or two 'till smooth (besides cherry chunks).
  3. To frost the cupcakes, I like to add a spoonful of frosting to the center of the cupcake then gently push the frosting out towards the edges with the spoon.  This frosting is pretty thin and smooths out easily.
  4. Top with naturally red decorations, if desired.  To add a heart: add a dollop of fruit spread slightly higher than the center of the cupcake, then drag a knife through the middle of the dollop, top to bottom, to pull into a heart shape.
  5. Store frosted cupcakes in the fridge, but let them sit at room temperature to warm up before serving.  Brock and I think these pair well with red wine...


notes:
* Using non-alkalized cocoa is important because it preserves the low pH of the batter, which helps keep the color bright.
**Double the baking powder at lower elevations.
***For this I just buy a package of peeled, steamed beets, found by the salad stuff in the produce section at the grocery store.  If you're cooking your own you'll need about 6 small, 4 medium, or 2 to 3 large beets.
****Get a 10 ounce jar of fruit spread and you'll use the whole thing between the cupcakes and the frosting.

Wednesday, January 25, 2012

breakfast•bars

School day mornings are hectic.  I really don't make it easy on myself by staying in bed 'till the last possible minute, then trying to get myself ready in ten minutes while simultaneously trying to get both of my boys dressed.  But, I'm not a morning person.  
Neither is Oliver.  I often end up waking him up a little too late, and feeding him (and myself) breakfast when we return home after getting Owen to school.  But this doesn't cut it on mornings when he goes to school, too.
The other morning I ended up handing him a Kashi banana chocolate chip bar to nosh in the car.  I figured this made a fine in-a-pinch breakfast, but these bars are not cheap.  I made a vow to not make a habit of them. 
But that sure was handy...
Next I made another vow to come up with a recipe for a breakfast bar-- something with all kinds of healthy stuff in them that I could hand to the kids once they're strapped into their car seats, or as they're standing there trying to wake up, wondering why Mommy's always running around like a crazy woman first thing in the morning.  
These bars are my solution.  Bake them the day before, and they're just as handy as the Kashi ones.  I don't know for sure, but I'd suspect these have less sugar, too.  My bars are just barely sweet.  They're not one of those breakfast treats that could also pass as dessert (although maybe with a drizzle of maple frosting or topped with a scoop of ice cream...), but those things always leave a person feeling crappy an hour or two into the day, anyway.  My bars are a wholesome, hearty (yet still yummy) start to the day that will keep you feeling good 'till lunch (or maybe snack time when you go back for more).


So, this morning, I had these around to hand to the kiddos amidst the craziness.  They're easier for them to handle (and therefore a little less messy) than a muffin, but they gobble them up as if they were their favorite muffins.  So, breakfast was taken care of.  Next was to get Oliver's lunch packed, gather Owen's snow clothes, get everybody dressed, fix everyone's hair...  
I always manage to get my act together, but I usually get Owen to school somewhere between five and fifteen minutes behind schedule.  But really, is it reasonable to expect a preschooler to be at school at 7:30 in the morning (or to expect his morning-challenged mother to be able to get him there by that time)?
If I can manage to (at least sort of) meet this crazy expectation, my reward is some quiet time with a cappuccino and a breakfast bar when I return home.  
Whew!


the veggies:

  • 1 cup white whole wheat flour
  • 1 cup all-purpose flour
  • 2 tsp baking powder*
  • 1/2 tsp salt
  • 1/4 cup flax seed meal
  • 1 1/4 cups almond milk (or whatever kind of milk you have on hand, divided)
  • 1 really ripe banana
  • 1 cup shredded sweet potato
  • 1/2 cup canola oil
  • 1/2 cup pure maple syrup
  • 1 tsp vanilla
  • 1 1/2 cups rolled oats
  • 1/2 cup roughly chopped dates
  • 1/2 cup sliced almonds (or other nuts, chopped)


the love:

  1. Preheat your oven to 375° and oil a 10 by 15 inch baking pan.**
  2. In a large bowl, stir together the flours, baking powder and salt.
  3. In a blender, blend together the flax meal and 1/4 cup milk for about a minute, until gooey. 
  4. Scrape down the sides of the blender pitcher, then add the banana, sweet potatoes, 1 cup milk, canola oil, maple syrup and vanilla and blend until smooth.
  5. Add the oats to the blender and pulse a couple times, until most of the oats are mixed in.
  6. Add the wet ingredients to the dry ingredients in the bowl and stir until just incorporated (batter will be pretty thick).
  7. Fold in the dates and almonds.
  8. Spread the batter evenly into your prepared pan, and bake about 25 minutes, or until firm in the center.
  9. Cool slightly before cutting into bars,*** and cool completely before storing in an airtight container until breakfast.


tips:
*Double the baking powder if you're at low altitude.
**A slightly larger or smaller pan would also work fine with these, but would obviously affect the thickness and texture.  My theory: thicker bars would be more muffin-like, and thinner ones would be chewier and possibly less messy in the car.
***I like to cut them widthwise into four, then lengthwise into four to make 16 big rectangles.

Monday, January 23, 2012

spaghetti with lemon-arugula•pesto

Oliver loves to sit on the potty lately.  This is generally a really good thing-- especially considering he's not even two.  I really only have two issues with this:
1. The fact that it's often hard to get him off of the potty.  This is especially an issue when, say, it's time to go pick up Owen from school and he won't budge.  I end up having to pluck him off the potty, pin him down to get a diaper and pants on him, then carry him kicking and screaming to the car.
2. The fact that he sits there almost constantly screaming, "POOP THE POTTY!" at the top of his lungs until I come check if he did, indeed, poop the potty.  It turns out that most of the time, he did not.
Another big plus, though: it gives me a few minutes to do something uninterrupted while he's in there mindlessly playing with himself and paging through a book about animals.  That is, if I can do it while listening to him scream "POOP THE POTTY!...  POOP THE POTTY!... POOP THE POTTY!..."  If I hurry, it's just enough time, for example, to throw together some pesto for tonight's dinner.  
Having the pesto ready ahead of time makes dinner super-easy to put together later.  Sometimes we keep it simple and just eat a big bowl of this stuff solo, which means simply boiling pasta and tossing everything together at dinner time.  If I have the time, though (say, if Ollie wants to sit on the potty again right before dinner) I'll also steam a green veggie for on the side and slice up some whole-grain french bread.  
Surprisingly, despite the fact that it contains arugula (a green I honestly didn't like until about five years ago), my kids love it.  Owen once said, while slurping a lemon-arugula noodle, "I could eat this all day!"  
Ollie really likes it, too.  But not as much as he likes sitting on the potty.


the veggies:

  • about 2/3 box (or roughly 10 ounces) of Barilla Plus spaghetti (or other pasta)*
  • zest and juice from one lemon
  • 1/2 tsp salt
  • 1/2  cup shredded parmesan, plus more for garnish (optional)
  • leaves from one large basil stem (about 1/2 cup loosely packed leaves or roughly half a .66 ounce package)
  • 3 cups baby arugula, loosely packed
  • 1/4 cup extra virgin olive oil
  • salt and pepper, to taste


the love:

  1. Cook the pasta in boiling, salted water until al dente, then drain.
  2. In a small food processor, blend the lemon zest and juice, salt, parmesan, basil and arugula until well processed.
  3. With the processor running, add the oil in a stream and process until evenly incorporated.
  4. While the pasta is still hot, toss it with the pesto sauce in a large bowl.  Add salt and fresh ground pepper, to taste.
  5. Serve garnished with extra shredded parmesan, if that sounds good.


tip:

*This is also good on cheese tortellini, but you'll need to play with the pasta-to-pesto ratio to get it right.